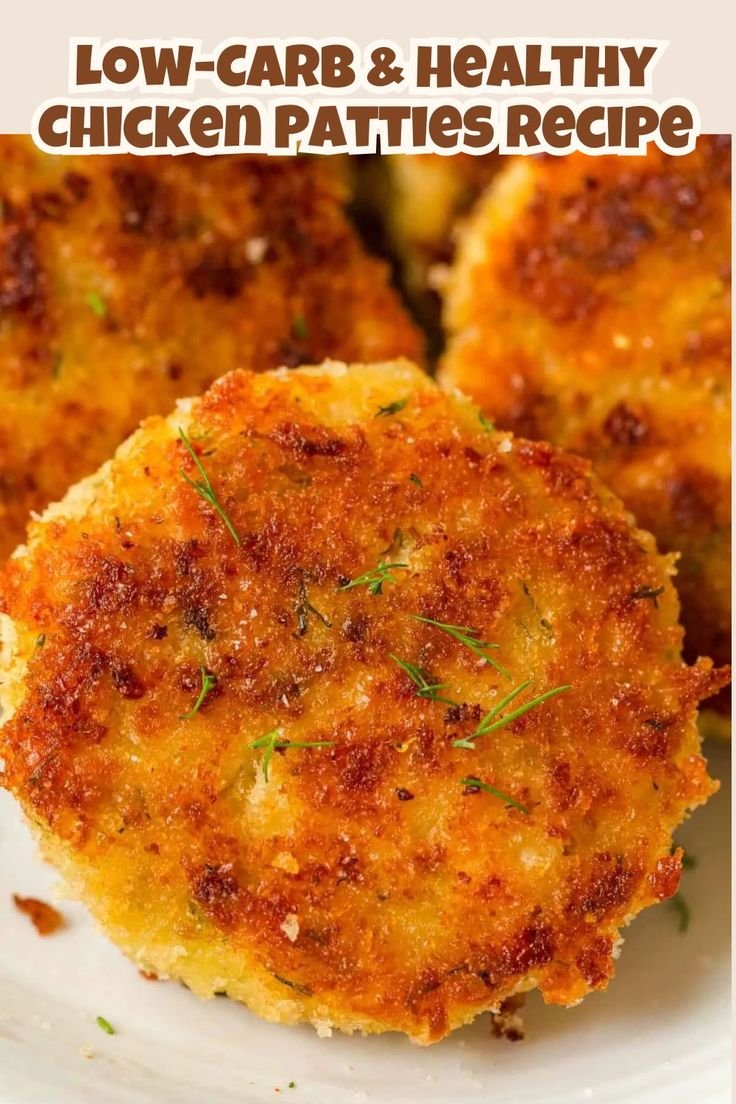
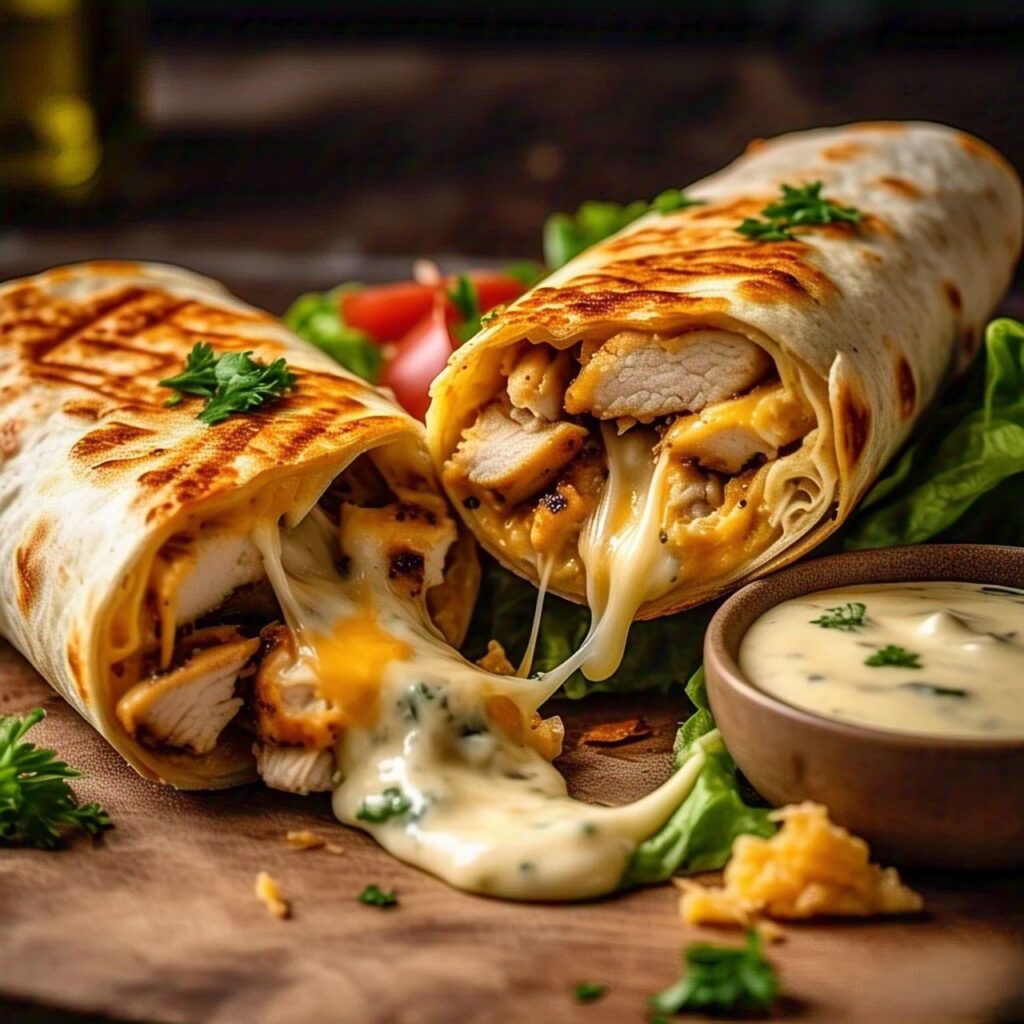
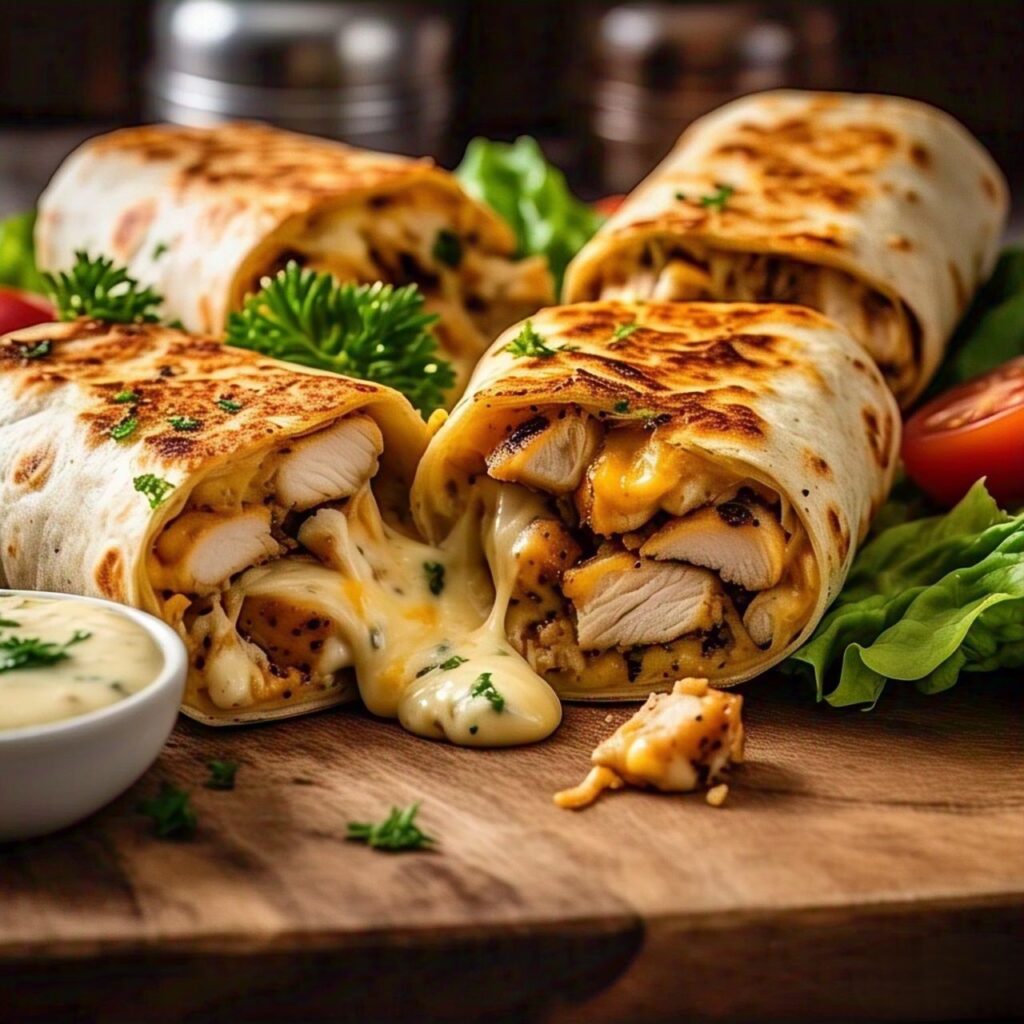
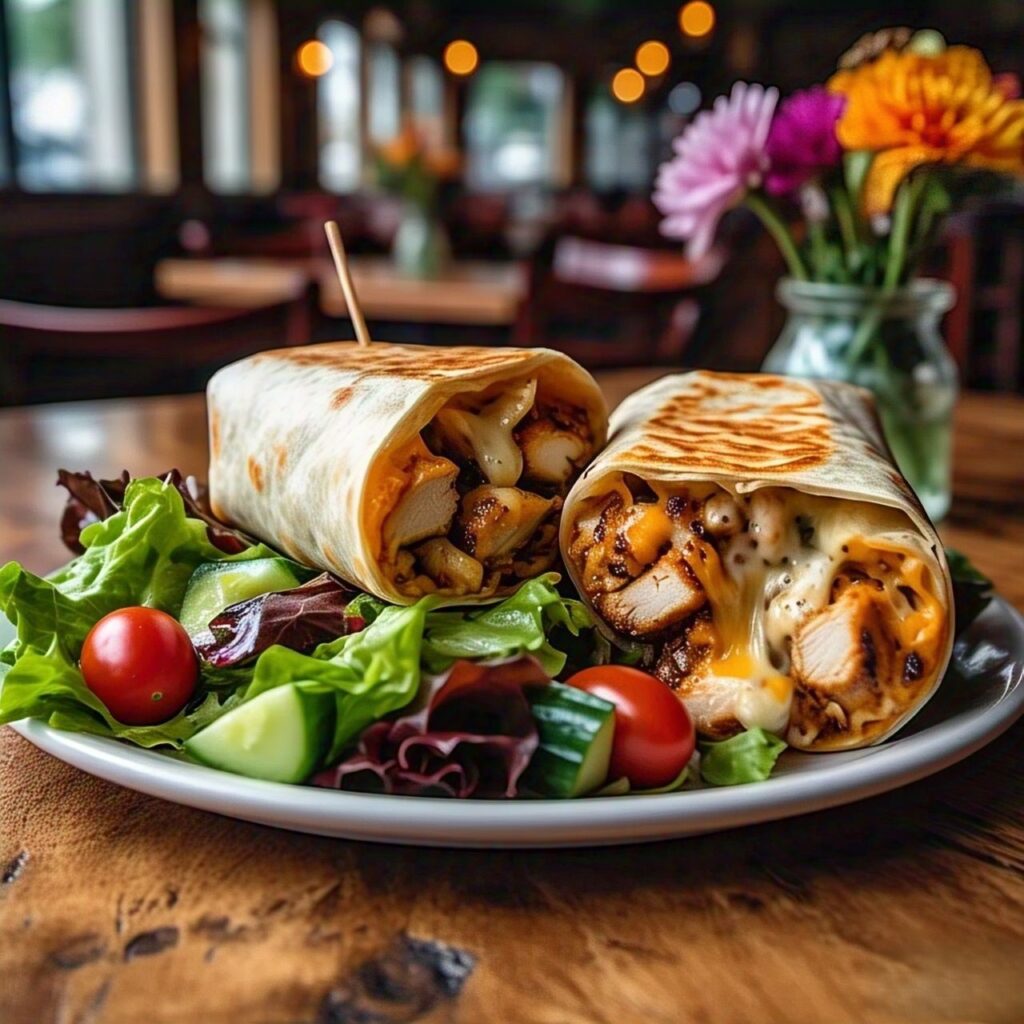
If you’re looking for a delicious, easy-to-make meal that’s low-carb, high-protein, and keto-friendly, then Cheesy Garlic Chicken Wraps are the perfect choice. These wraps are packed with tender, juicy chicken, melted cheese, and a rich garlic flavor that makes every bite irresistible. Whether you’re on a gluten-free diet or just want a quick and satisfying meal, this recipe ticks all the boxes.
Not only do these wraps taste amazing, but they also come together in under 30 minutes, making them perfect for busy weeknights. Plus, they’re versatile—you can customize them with different cheeses, low-carb tortillas, or even lettuce wraps for an extra keto-friendly twist.
Here’s a quick breakdown of the recipe:
| Feature | Details |
|---|---|
| Prep Time | 10 minutes |
| Cook Time | 15 minutes |
| Total Time | 25 minutes |
| Calories | Approx. 350 per wrap |
| Protein | High |
| Carbs | Low |
| Dietary Info | Keto, Gluten-Free |
| Serving Size | 2 wraps per person |
| Difficulty | Easy |
Why You’ll Love This Recipe
There are plenty of reasons why Cheesy Garlic Chicken Wraps will become your new favorite meal. Here’s what makes them special:
- Quick & Easy – With minimal prep and fast cooking time, these wraps are perfect for weeknight dinners or a quick lunch.
- Loaded with Flavor – The combination of garlic, melted cheese, and juicy chicken creates an incredibly rich and satisfying taste.
- Low-Carb & Keto-Friendly – If you’re watching your carbs, this recipe is a great option while still feeling indulgent.
- Customizable – You can switch up the cheese, add veggies, or even swap out tortillas for a low-carb alternative.
- Family-Friendly – Even picky eaters will love these cheesy, garlicky wraps!
- Great for Meal Prep – These wraps store well, making them a perfect make-ahead meal.
Ingredients to Make Cheesy Garlic Chicken Wraps

To make these cheesy garlic chicken wraps, you’ll need a combination of simple and flavorful ingredients. Below is a detailed breakdown of each ingredient, including the amount required and why it’s essential for this recipe.
1. Chicken Breast – 2 medium-sized (about 12 oz total)
Chicken breast is lean, high in protein, and absorbs flavors well. Slice it into thin strips for even cooking. If you prefer a juicier texture, you can substitute with boneless, skinless chicken thighs.
2. Garlic – 3 cloves (minced)
Fresh garlic adds an irresistible aroma and deep, savory flavor. Minced garlic is sautéed in butter to enhance its natural sweetness. If fresh garlic isn’t available, you can use ½ teaspoon of garlic powder instead.
3. Shredded Cheese – 1 cup (½ cup mozzarella + ½ cup cheddar)
A blend of mozzarella and cheddar works best, as mozzarella provides a stretchy, gooey texture, while cheddar adds a rich, sharp flavor. Feel free to experiment with other cheeses like pepper jack or gouda for a twist.
4. Low-Carb Tortillas – 4 medium-sized
For a keto-friendly option, use low-carb tortillas. If you’re strictly avoiding carbs, substitute them with large lettuce leaves or cheese wraps. Regular flour tortillas can be used if you’re not following a low-carb diet.
5. Butter – 2 tablespoons
Butter enhances the flavor by adding richness and helps sauté the garlic to release its aroma. You can also use olive oil if you prefer a lighter alternative.
6. Seasonings:
- Salt – ½ teaspoon (enhances all the flavors)
- Black Pepper – ½ teaspoon (adds mild heat and depth)
- Paprika – ½ teaspoon (gives a subtle smoky flavor)
- Italian Seasoning – 1 teaspoon (a blend of oregano, basil, thyme, and rosemary for extra flavor)
- Red Pepper Flakes – ¼ teaspoon (optional) (for a little spice)
7. Fresh Herbs – 2 tablespoons (chopped parsley or cilantro, optional)
Adding fresh herbs at the end brightens up the dish and provides a fresh contrast to the cheesy, garlicky flavors.
Steps to Make Cheesy Garlic Chicken Wraps
Now that we have all the ingredients ready, let’s go through the step-by-step process to make these delicious wraps.
Step 1: Prepare the Chicken
Start by slicing the chicken breasts into thin strips. This allows them to cook faster and evenly absorb the seasonings. Place the sliced chicken in a bowl and season with:
- ½ teaspoon salt
- ½ teaspoon black pepper
- ½ teaspoon paprika
- 1 teaspoon Italian seasoning
Mix well, ensuring all pieces are coated with the seasoning. Let the chicken sit for about 5 minutes to allow the flavors to penetrate.
Step 2: Cook the Chicken
Heat 1 tablespoon of butter (or olive oil) in a large skillet over medium heat. Once melted, add the seasoned chicken strips. Cook for about 6-7 minutes, stirring occasionally, until they turn golden brown and are fully cooked.
To check if the chicken is done, cut a piece to ensure there’s no pink inside, or use a meat thermometer (internal temperature should reach 165°F / 75°C). Once cooked, remove the chicken from the pan and set it aside.
Step 3: Sauté the Garlic
In the same skillet, reduce the heat to low and add the remaining 1 tablespoon of butter. Once melted, add 3 minced garlic cloves and sauté for 30 seconds to 1 minute, stirring continuously. You’ll know it’s ready when the garlic turns golden and releases a rich aroma. Be careful not to burn it, as burnt garlic can taste bitter.
Step 4: Melt the Cheese
Keep the heat on low and sprinkle in 1 cup of shredded cheese (½ cup mozzarella + ½ cup cheddar). Stir gently until the cheese starts to melt and blends with the garlic butter, creating a creamy, flavorful mixture.
If you like a little spice, this is the time to add ¼ teaspoon of red pepper flakes.
Step 5: Assemble the Wraps
Lay a low-carb tortilla on a flat surface. Place a generous amount of cooked chicken in the center, then spoon some of the cheesy garlic sauce over it. Sprinkle some freshly chopped parsley or cilantro for added freshness.
Fold the tortilla tightly, tucking in the sides first and then rolling it up like a burrito to secure the filling. Repeat with the remaining tortillas.
Step 6: Toast the Wraps
Heat a clean skillet over medium heat. Place the assembled wraps seam-side down in the pan and cook for 1-2 minutes per side, pressing gently with a spatula, until golden brown and crispy. This step adds a nice crunch and enhances the overall texture.
Step 7: Serve and Enjoy
Once all the wraps are toasted, transfer them to a serving plate. Cut them in half diagonally for a more visually appealing presentation. Serve immediately with your favorite dipping sauce, such as garlic aioli, ranch, or spicy mayo.

Cheesy Garlic Chicken Wraps
Course: DinnerCuisine: American4
servings10
minutes15
minutes400
kcal25
minutesThese Cheesy Garlic Chicken Wraps are a perfect combination of tender chicken, creamy garlic cheese sauce, and a crispy wrap, making them a delicious and satisfying meal. They are low carb, high in protein, and can easily be customized for your taste!
Ingredients
Chicken breast – 2 large, boneless and skinless
Cheddar cheese – 1 cup, shredded
Mozzarella cheese – 1 cup, shredded
Butter – 2 tablespoons
Garlic cloves – 3, minced
Cream cheese – 1/4 cup
Garlic powder – 1 teaspoon
Paprika – 1/2 teaspoon
Tortillas – 4 large (whole wheat, gluten-free, or low-carb tortillas)
Salt & pepper – to taste
Olive oil – for pan-frying
Directions
- Cook the Chicken: Heat 1 tablespoon of olive oil in a pan over medium heat. Season the chicken breasts with salt, pepper, and paprika. Cook for 6-8 minutes per side, until golden brown and cooked through. Remove from the pan, let rest, and slice thinly.
- Make the Garlic Cheese Sauce: In the same pan, melt 2 tablespoons of butter over medium heat. Add the minced garlic and sauté for 1-2 minutes until fragrant. Add the cream cheese, cheddar cheese, and mozzarella cheese, stirring until melted and smooth.
- Assemble the Wraps: Warm the tortillas in the pan for about 1 minute on each side. Lay the sliced chicken in the center of each tortilla. Pour the cheesy garlic sauce over the chicken, then roll the tortillas tightly into wraps.
- Toast the Wraps: Heat a little oil in the pan over medium heat. Toast the wraps for 2-3 minutes per side until golden and crispy.
Notes
- You can substitute chicken with other proteins like turkey, shrimp, or tofu.
- Add some diced jalapeños or hot sauce for extra spice.
- Feel free to use any type of tortilla, including gluten-free or low-carb options.
- These wraps can be made ahead and stored in the fridge for up to 2 days, or frozen for up to 2 months.
Can We Make Cheesy Garlic Chicken Wraps in Advance?
Yes, you can prepare these wraps in advance, making them a perfect meal for busy days.
If you want to make them ahead, cook the chicken, prepare the garlic cheese sauce, and chop any fresh herbs in advance. Store the cooked chicken in an airtight container in the fridge for up to 2 days. The garlic cheese sauce can also be refrigerated and reheated when needed.
For fully assembled wraps, you can prepare them a day before and store them in the fridge. Just wrap them tightly in plastic wrap or foil to keep them fresh. However, it’s best to toast them just before eating to maintain the crispiness.
Freezing is another option. Assemble the wraps, wrap them individually in parchment paper or plastic wrap, and store them in a freezer-safe bag for up to 2 months. When ready to eat, let them thaw overnight in the fridge and toast them in a pan or air fryer until warm and crispy.
To reheat, warm them in a pan over low heat for 3-4 minutes per side. If frozen, bake at 350°F (175°C) for 10-12 minutes until heated through.

Tips and Tricks
For the best cheesy garlic chicken wraps, keep these tips in mind:
- Use fresh garlic instead of garlic powder for a richer flavor. Sauté it gently in butter to avoid burning.
- Don’t overcrowd the pan when cooking the chicken. This helps achieve a nice sear and better flavor.
- Toasting the wraps is essential for a crispy texture. Use a pan or an air fryer at 375°F (190°C) for 5-6 minutes.
- Use a mix of cheeses like mozzarella and cheddar for the perfect balance of stretchiness and taste.
- For extra flavor, add a pinch of smoked paprika or red pepper flakes to the filling.
Serving Suggestions
Cheesy garlic chicken wraps are versatile and can be enjoyed in many ways. Whether you want a light meal or a hearty feast, here are some great ways to serve them:
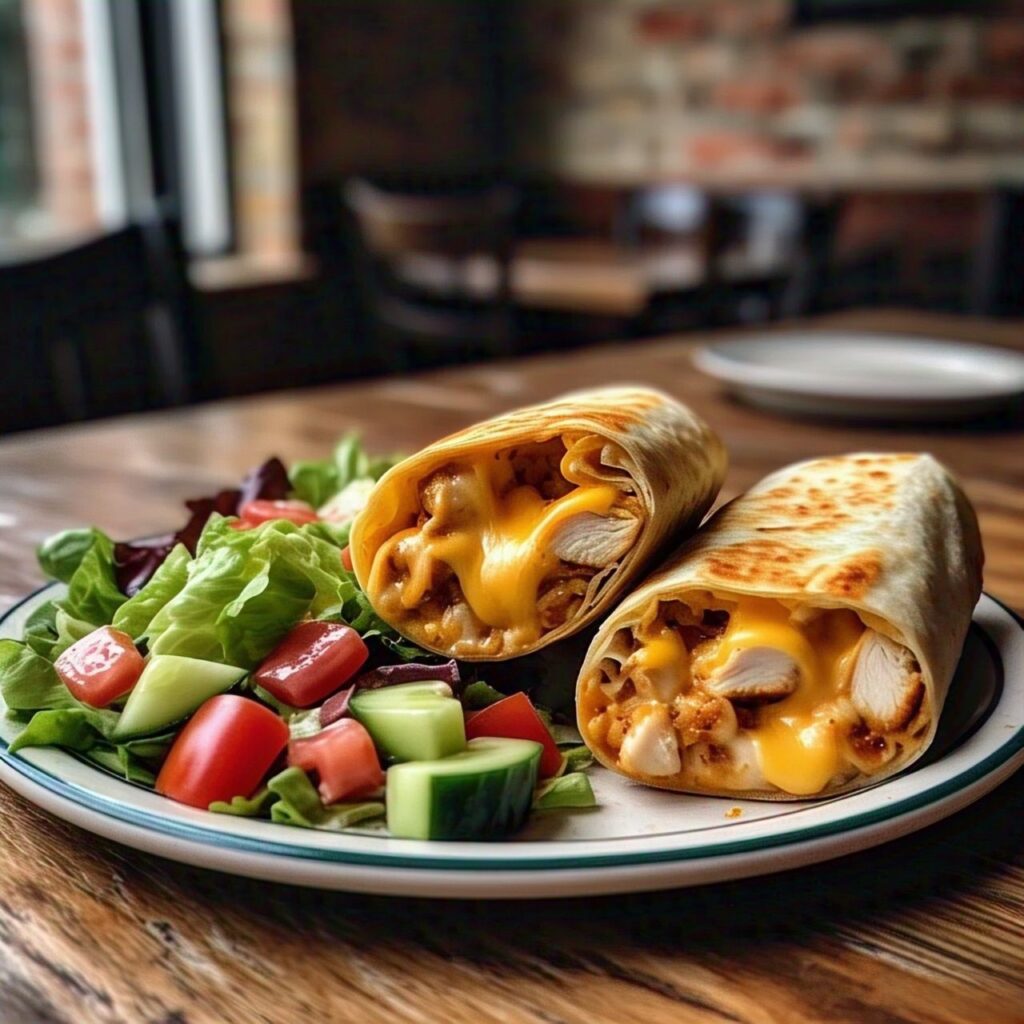
For a complete meal, pair them with a fresh salad like a Caesar or Greek salad. The crispiness of fresh greens complements the cheesy, garlicky flavors of the wrap. If you prefer something warm, roasted vegetables like bell peppers, zucchini, or asparagus make a great side dish.
Dipping sauces can enhance the taste even further. A classic garlic aioli, ranch dressing, or a spicy chipotle mayo pairs beautifully with these wraps. For a lighter option, a side of Greek yogurt with herbs works well too.
If you’re serving these wraps for a gathering, cut them into smaller pieces and arrange them on a platter with toothpicks for easy sharing. They also go well with sweet potato fries or crispy potato wedges for a satisfying meal.
For a low-carb option, serve them with cauliflower rice or a side of avocado slices. The creaminess of avocado pairs well with the cheesy chicken filling, adding a fresh and healthy touch.
Variations of Cheesy Garlic Chicken Wraps
This recipe is highly customizable, and you can easily tweak it based on your taste or dietary preferences.
For a spicy version, add sliced jalapeños or a dash of hot sauce to the filling. A sprinkle of red pepper flakes can also add a nice kick.
If you prefer a vegetarian version, swap the chicken for grilled mushrooms, tofu, or roasted chickpeas. You can still use the same garlic cheese sauce to maintain the flavor.
For a Mediterranean twist, replace the cheddar cheese with feta and add sun-dried tomatoes, olives, and a touch of oregano. This gives the wrap a tangy and refreshing flavor.
To make it extra cheesy, try using a combination of mozzarella, gouda, and Parmesan. This blend adds more depth and a rich, creamy texture to the wrap.
If you’re following a low-carb diet, you can skip the tortilla and use large lettuce leaves as a wrap alternative. This keeps the meal light while still packing in all the delicious flavors.
Storage Instructions
Storing cheesy garlic chicken wraps properly helps maintain their freshness and flavor. If you have leftovers or want to save some for later, follow these storage guidelines.
If you plan to eat them within a day or two, store the wraps in the refrigerator. Wrap each one tightly in plastic wrap or aluminum foil and place them in an airtight container. This prevents them from drying out and keeps the flavors intact. Properly stored, they will stay fresh for up to 3 days.
For longer storage, freezing is a great option. Wrap each assembled but uncooked wrap in parchment paper or plastic wrap, then place them in a freezer-safe bag. This keeps them fresh for up to 2 months. If you have already toasted the wraps, let them cool completely before wrapping and freezing.
To prevent sogginess when reheating, avoid freezing wraps that contain fresh vegetables like lettuce or tomatoes. Instead, add those ingredients fresh after reheating.
Can We Reheat Garlic Chicken Wraps?
Yes, reheating these wraps is easy, and you have several methods to choose from based on convenience and texture preference.
If the wraps were stored in the refrigerator, reheat them in a pan over medium-low heat for 3-4 minutes per side until they are warm and crispy. This method helps maintain their crunch.
For a quick option, use a microwave. Place the wrap on a microwave-safe plate, cover it with a damp paper towel, and heat it for 30-45 seconds. This prevents it from drying out but won’t keep it crispy.
If the wraps were frozen, let them thaw in the refrigerator overnight before reheating. Then, warm them in the oven at 350°F (175°C) for 10-12 minutes until heated through. You can also reheat them in an air fryer at 375°F (190°C) for 5-6 minutes for a crispy finish.
To keep the best texture and taste, avoid microwaving frozen wraps directly, as it can make them soggy. Instead, opt for oven or stovetop reheating for the best results.
Recipe FAQs
Can I make these wraps without chicken?
Yes, you can easily substitute the chicken with other protein options like grilled shrimp, turkey, or even tofu for a vegetarian version. You can also try a bean-based filling like black beans or chickpeas for a plant-based option.
Can I use a store-bought wrap?
Absolutely! If you’re short on time or prefer convenience, you can use store-bought tortillas. Just make sure to choose a wrap that fits your dietary preferences, such as gluten-free or low-carb options.
How can I make these wraps spicier?
To add heat, try adding diced jalapeños to the filling or sprinkle some red pepper flakes in the garlic sauce. You can also mix in a few drops of hot sauce for an extra kick.
Can I make these wraps dairy-free?
Yes, you can. Use a dairy-free cheese or vegan cheese option and substitute the butter with olive oil or a dairy-free butter substitute. You can also skip the cheese for a lighter version, but it will affect the flavor and texture.
Conclusion
Cheesy Garlic Chicken Wraps are a perfect combination of rich, savory flavors with a satisfying crunch. They are versatile, easy to prepare, and customizable to fit various dietary preferences. Whether you’re making them in advance for a busy week or looking for a quick and delicious meal, these wraps are sure to please.
From their delicious cheesy filling to the crispy golden wrap, they are a crowd-pleaser for any occasion. You can also experiment with different variations, like adding extra spice, veggies, or different proteins, to make this recipe your own.
Make sure to try these Cheesy Garlic Chicken Wraps for your next meal—they’re guaranteed to be a hit!